Last updated: April 2026. All prices and plan details verified against provider websites.

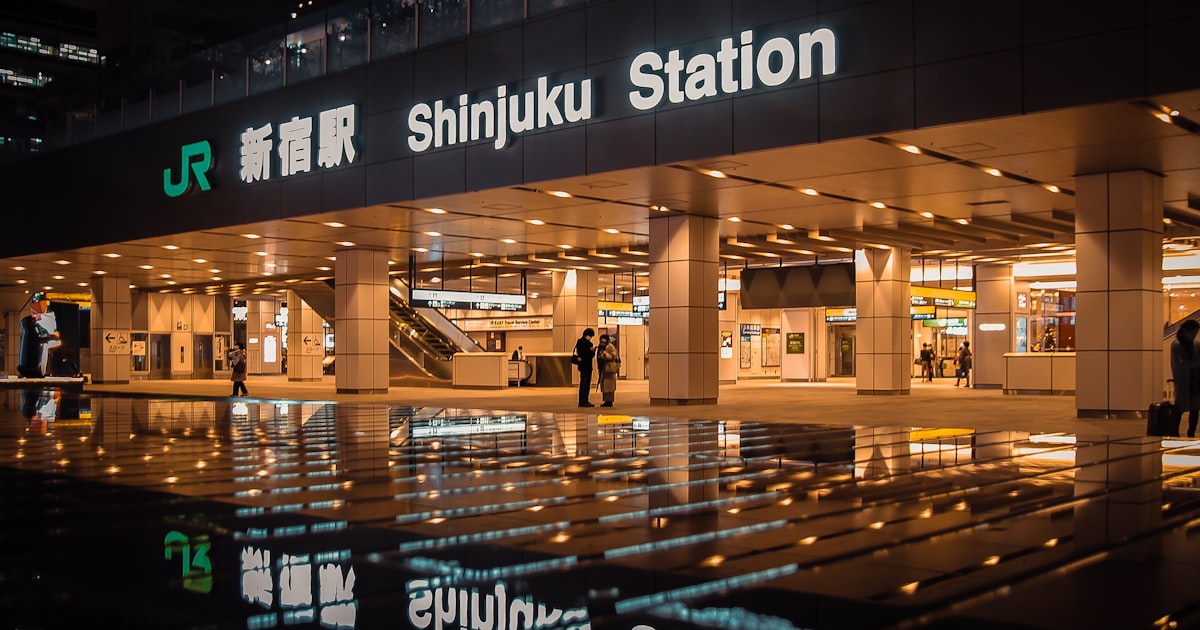
You just booked your flight to Japan. Now comes the question every traveler hits: how do I stay connected? Google Maps alone will save you from getting lost in Shinjuku Station’s 200+ exits, and you’ll want to look up train times, translate menus, and post photos from that collab cafe you’ve been dreaming about.
I’ve tested all three options across multiple Japan trips — eSIMs, pocket WiFi devices, and physical SIM cards. Each has clear strengths depending on your travel style, group size, and budget. This guide breaks down exactly what works, what doesn’t, and which option fits your trip.
Short answer: for most solo travelers in 2026, an eSIM is the best choice. For groups of 2-4 sharing one connection, a pocket WiFi still makes sense. Physical SIM cards are the fallback for older phones.
- Table of Contents
- Quick Comparison: eSIM vs Pocket WiFi vs SIM Card
- Option 1: eSIM — Best for Solo Travelers
- Option 2: Pocket WiFi — Best for Groups
- Option 3: Physical SIM Card — Best for Older Phones
- Free WiFi in Japan — What You Can Actually Expect
- How to Choose: Decision Flowchart
- Top eSIM Providers for Japan (2026)
- Top Pocket WiFi Rentals for Japan (2026)
- Step-by-Step Setup Guide
- Pro Tips from Experience
- FAQ
- More Practical Guides
Table of Contents
- Quick Comparison Table
- Option 1: eSIM — Best for Solo Travelers
- Option 2: Pocket WiFi — Best for Groups
- Option 3: Physical SIM Card — Best for Older Phones
- Free WiFi in Japan — What You Can Actually Expect
- How to Choose: Decision Flowchart
- Top eSIM Providers Compared
- Top Pocket WiFi Rentals Compared
- Step-by-Step Setup Guide
- Pro Tips from Experience
- FAQ
Quick Comparison: eSIM vs Pocket WiFi vs SIM Card
| Feature | eSIM | Pocket WiFi | Physical SIM |
|---|---|---|---|
| Price (7 days) | $3-15 | $25-45 | $15-30 |
| Setup time | 5 minutes (before flight) | 15 min (airport pickup) | 10 min (swap SIM at airport) |
| Devices connected | 1 phone | 5-10 devices | 1 phone |
| Battery worry | None | Yes (8-12 hour battery) | None |
| Extra device to carry | No | Yes | No |
| Phone compatibility | iPhone XS+ / recent Android | Any device with WiFi | Unlocked phone with SIM slot |
| Keep your number | Yes (dual SIM) | Yes | No (replaces SIM) |
| Best for | Solo travelers, couples | Families, groups of 3-4 | Budget travelers, older phones |
Option 1: eSIM — Best for Solo Travelers

Photo: Unsplash
An eSIM is a digital SIM card built into your phone. No physical card to swap, no device to carry, no airport counter to find. You buy it online, scan a QR code, and you’re connected before your plane even lands at Narita or Haneda.
Why I recommend eSIMs for most travelers
The convenience factor is hard to beat. On my last trip, I activated my Ubigi eSIM while still on the plane (during the taxi to the gate with WiFi). By the time I cleared immigration and grabbed my bag, I had full 4G/5G coverage. Compare that to waiting 20 minutes in line at a SIM counter while jet-lagged.
eSIMs also let you keep your home phone number active. Your phone runs two connections — your regular SIM for calls/texts from home, and the eSIM for Japan data. This matters if you need to receive bank verification codes or stay reachable on your normal number.
eSIM limitations to know
Your phone needs to support eSIM. Most phones from 2019 onward do — iPhone XS and later, Samsung Galaxy S20 and later, Google Pixel 3 and later. If you’re not sure, check Settings > Cellular > Add eSIM on iPhone, or Settings > Connections > SIM manager on Samsung.
The other catch: one eSIM = one device. If you’re traveling with a partner who also needs data, you each need your own eSIM (or consider pocket WiFi instead).
Option 2: Pocket WiFi — Best for Groups

Photo: Unsplash
A pocket WiFi is a small battery-powered device (about the size of a credit card, but thicker) that creates a personal WiFi hotspot using Japan’s cellular network. You rent it at the airport or have it delivered to your hotel.
When pocket WiFi makes sense
Traveling with family or a group of friends? One pocket WiFi device connects 5-10 devices simultaneously. For a family of four, that’s one rental fee instead of four separate eSIMs. The math works out: a 7-day pocket WiFi rental runs about $25-45 total, while four eSIMs would cost $12-60 total depending on the provider.
Pocket WiFi also works with any device — laptops, tablets, older phones, Nintendo Switch. If you need to work from a cafe in Shimokitazawa or let the kids watch anime on the Shinkansen, pocket WiFi handles it all.
Pocket WiFi downsides
Battery life is the main headache. Most devices last 8-12 hours, which sounds fine until you’re on hour 10 of exploring Akihabara and your Maps dies right when you need it. I always carry a power bank when using pocket WiFi — it’s essentially mandatory for long days out.
You also need to keep the device with you. If your group splits up for the afternoon (one person at Nakano Broadway, another at Harajuku), only the person carrying the device has internet. And if you forget to charge it overnight, your morning starts with no connection.
Return logistics add a small hassle too. Most rentals require you to drop the device at an airport counter or designated return box before your departure flight. Miss the return and you’ll get charged.
Option 3: Physical SIM Card — Best for Older Phones

Photo: Unsplash
A physical prepaid SIM card works like your regular SIM but with a Japan data plan. You buy one at the airport, pop it into your phone, and go.
When to choose a physical SIM
If your phone doesn’t support eSIM — maybe it’s an older model, or a budget phone without the feature — a physical SIM is your best bet for direct connectivity without carrying an extra device. You can buy them from vending machines at Narita, Haneda, and Kansai airports (available 24/7), at electronics shops, or even at some convenience stores like 7-Eleven and FamilyMart in tourist areas.
You can also buy prepaid Japan SIM cards on Amazon before your trip. Brands like IIJmio Japan Travel SIM, Mobal, and bmobile offer cards that ship to your home address, so you arrive in Japan already prepared. Amazon Japan SIMs typically run $15-30 for 1-3GB over 7-30 days. Just make sure your phone is unlocked before purchasing.
Physical SIM downsides
You lose access to your home phone number while the Japan SIM is in your phone (unless your phone has dual physical SIM slots, which most don’t). This means no receiving calls or texts on your regular number. You’ll also need a SIM ejector pin and a safe place to store your home SIM — losing it abroad is a nightmare.
Prices tend to be higher per GB than eSIMs, especially at airport counters where convenience pricing applies. A typical airport SIM runs 3,000-5,000 yen ($20-33) for 3-5GB over 7-15 days.
Free WiFi in Japan — What You Can Actually Expect
Can you survive on free WiFi alone? Technically yes, but I wouldn’t recommend it. Here’s the reality:
Where free WiFi works well: Major train stations (JR East stations, Tokyo Metro), convenience stores (7-Eleven, FamilyMart, Lawson — usually 60-minute sessions), Starbucks, and most hotels. The Japan Connected Free Wi-Fi app aggregates many of these hotspots.
Where it fails: Walking between locations (when you need Maps most), inside smaller shops, on trains themselves (except the Shinkansen and some limited express services), and in residential neighborhoods. Coverage is spotty once you leave major tourist corridors.
My recommendation: don’t rely on free WiFi as your primary connection. Use it as a supplement — save your eSIM/pocket WiFi data by connecting to hotel WiFi for big downloads and video calls.
How to Choose: Decision Flowchart
Step 1: Check your phone. Does it support eSIM? If yes, go to Step 2. If no, choose between pocket WiFi (group) or physical SIM (solo).
Step 2: How many people need data? Just you or you and a partner with eSIM-compatible phones? Get individual eSIMs. Group of 3+ or have devices that need WiFi (laptop, tablet)? Get a pocket WiFi.
Step 3: How long is your trip? Under 7 days: a 1-3GB eSIM plan is usually enough. 7-14 days: go for 5-10GB or a daily unlimited plan. Over 14 days: unlimited daily plans or 20GB+ bulk plans save money.
Top eSIM Providers for Japan (2026)
| Provider | Network | 7-day plan | Best for |
|---|---|---|---|
| Ubigi | NTT Docomo (5G) | 3GB / $9 | Rural travel, 5G speed |
| Airalo | SoftBank | 1GB / $4.50 | Budget, short trips |
| Holafly | SoftBank | Unlimited / $25 | Heavy data users, no worry |
| Klook eSIM | Docomo/SoftBank | From $1.50 / 1GB | Flexible plans, bundle deals |
| Saily | SoftBank | 1GB / $3.99 | Budget option by NordVPN team |
My pick: Ubigi for coverage, Airalo for budget
Ubigi runs on NTT Docomo’s network, which has the best coverage in rural Japan. If your itinerary includes anything outside Tokyo-Osaka — say, the One Piece statues in Kumamoto or mountain onsen towns — Docomo’s network won’t drop you. Ubigi also supports 5G in major cities, and their 3GB/30-day plan at $9 gives solid value.
Airalo uses SoftBank, which covers Tokyo, Osaka, Kyoto, and all major tourist cities perfectly well. Their plans start at just $4.50 for 1GB/7 days — enough for a long weekend of Maps navigation and translation apps. For a 2-week trip, their 5GB/30-day plan at $16 is hard to beat on price.
Holafly is the “don’t think about it” option. Unlimited data means no stress about running out, but it costs significantly more ($25 for 7 days). The 500MB/day hotspot cap is worth mentioning — you can share data with another device, but not much.
You can also grab a Japan eSIM directly through Klook starting from $1.50, with flexible plan options from 1GB to unlimited daily data. Klook often bundles eSIM deals with activity bookings, so check for combo discounts if you’re also booking collab cafe reservations or tours.
Ready to get your Japan eSIM?
Grab a Japan eSIM through Klook from just $1.50 — activate before your flight and land connected. Flexible data plans from 1GB to unlimited daily.
Browse Japan eSIM Plans on Klook
Instant QR code delivery. Works with iPhone XS+ and recent Android.
Top Pocket WiFi Rentals for Japan (2026)
| Provider | Daily rate | Data limit | Pickup locations |
|---|---|---|---|
| Ninja WiFi | From 440 yen/day | Unlimited | Narita, Haneda, Kansai, Chubu + delivery |
| Japan Wireless | From $4-6/day | Unlimited | Narita, Haneda, Kansai + delivery |
| Klook WiFi Rental | From $3/day | Unlimited | Airport pickup + delivery |
| Sakura Mobile | From 563 yen/day | Unlimited | Delivery to hotel/Airbnb |
For pocket WiFi, I recommend booking through Klook’s Japan WiFi rental page — prices tend to be 10-20% cheaper than booking direct, and airport pickup is seamless. Ninja WiFi and Japan Wireless are both reliable choices with unlimited data and good airport counter presence.
Booking tip: Reserve your pocket WiFi at least 1 week before your trip. Airport walk-in rentals cost 30-50% more and frequently sell out during peak travel seasons (cherry blossom in March-April, autumn leaves in November).
Book your Japan pocket WiFi
Unlimited data, airport pickup, 10-20% cheaper than direct booking. great for families and groups sharing one connection.
Compare Pocket WiFi Rentals on Klook
Free cancellation available. Pick up at Narita, Haneda, or Kansai airport.
Step-by-Step Setup Guide
eSIM setup (do this before your flight)
- Buy your eSIM from Airalo, Ubigi, Holafly, or Klook (1-3 days before departure is ideal)
- Install the eSIM profile — scan the QR code or use the provider’s app. On iPhone: Settings > Cellular > Add eSIM. On Android: Settings > Network > SIM manager
- Label it — name it “Japan Travel” so you can easily identify it
- Don’t activate yet — most plans start counting data from activation, not purchase
- Activate when you land — turn on the eSIM line and set it as your data source. Turn off data roaming on your home SIM
Pocket WiFi setup (at the airport)
- Pick up the device at your designated airport counter (bring your booking confirmation)
- Power on — press and hold the power button for 3 seconds
- Check the screen — it displays the WiFi network name and password
- Connect your phone — join the network like any WiFi. Save the password for reconnecting
- Charge nightly — plug in the device every night at your hotel
Physical SIM setup (at the airport)
- Buy from a vending machine or counter — vending machines in arrival halls work 24/7 and support English
- Eject your home SIM — use the pin tool included in the package. Store your home SIM safely (zip pocket or card holder)
- Insert the Japan SIM — follow the tray orientation guide
- Restart your phone — some SIMs auto-configure, others require APN settings (included in the package instructions)
Pro Tips from Experience
Download offline maps before you go. Open Google Maps, search “Tokyo” (or your destination), tap the three dots menu, and select “Download offline map.” This way, even if your data runs out or you’re in a subway tunnel, basic navigation still works.
Japan’s subway has no signal. Unlike some countries, Tokyo’s subway tunnels have limited cellular coverage. Download any directions or information you need before going underground. Most station platforms do have connectivity, so you can re-check at each stop.
Convenience store WiFi is your emergency backup. 7-Eleven, FamilyMart, and Lawson all offer free WiFi (usually 60-minute sessions, re-connectable). Look for “7SPOT”, “Famima_Wi-Fi”, or “LAWSON_Free_Wi-Fi” in your WiFi settings.
Data usage reality check: Google Maps navigation uses about 5-10MB per hour. Translation apps use very little. Posting Instagram stories is the biggest data drain — about 50-100MB per story with photos. Budget accordingly: 1GB lasts roughly 3-4 days of moderate tourist use without streaming.
FAQ
Can I use my regular phone plan in Japan?
Most carriers offer international roaming, but it’s expensive — typically $10/day for major US carriers, or $5-15/day for European plans. A Japan eSIM or pocket WiFi will almost always be cheaper for trips longer than 2 days.
Is 5G available for tourists in Japan?
Yes, through certain providers like Ubigi (Docomo network). 5G coverage exists in central Tokyo, Osaka, and other major cities. In practice, 4G/LTE is fast enough for everything tourists need — 5G is a nice bonus, not a necessity.
What if I run out of data?
Most eSIM providers let you buy a top-up plan through their app. For pocket WiFi, unlimited plans mean this isn’t an issue. For physical SIMs, you’ll need to buy a new one or switch to free WiFi spots.
Do I need a Japanese phone number?
For tourism, no. Data-only plans (which most eSIMs and pocket WiFi provide) are sufficient. The only scenario where you’d need a Japanese number is making domestic phone calls, which you can handle through LINE or WhatsApp instead.
Can I use an eSIM and physical SIM at the same time?
Yes, that’s the beauty of eSIM. Most modern phones support one physical SIM + one eSIM simultaneously. Keep your home SIM for calls/texts and use the eSIM for Japan data.
More Practical Guides
Written by Takapon
Born and raised in Kyoto, currently in Tokyo. Former management consultant turned anime culture writer. Has visited countless collaboration cafes and pilgrimage spots across Japan. Also sharing tips on Instagram @pop_now_jp.
Follow @pop_now_jp on Instagram

Comments