Last updated: April 2026.
Japan Trip Checklist for Anime Fans: Everything to Book Before You Go (2026)
I’ve learned the hard way that the difference between a trip where you catch your target collab cafe before it sells out and one where you miss it by three days comes down to what you book in the three months before you land. I showed up to Tokyo once having booked nothing except my flight—no JR Pass, no accommodation locked in, no collab cafe lottery entries submitted. I spent my first two days frantically calling hotels and ended up in a capsule pod in Shinjuku instead of Nakano where I could have walked to four anime shops. That trip taught me that anime fans need a different checklist than regular tourists.
This is the system I now use, and what I recommend to anyone heading to Japan for the anime scene. It’s organized by when you should book things, not by category, because timing matters more than you’d think. Some events only accept lottery entries 60 days in advance. JR Pass discounts depend on booking windows. Collab cafes schedule announcements four to six weeks out. Here’s what to do and when to do it.
Table of Contents
- 3 Months Before: The Big Bookings
- 1 Month Before: Connectivity & Insurance
- 2 Weeks Before: Collab Cafe & Event Prep
- 1 Week Before: Packing for Anime Fans
- Day 1 in Japan: First Things to Do
- Downloadable Checklist
- More Practical Guides
3 Months Before: The Big Bookings
Three months out is when the real planning begins. This is your window for locking in flights, accommodation, rail passes, and event tickets. Miss this window and you’ll be paying premium prices or taking whatever’s left.
Book Your Flights
Flights to Tokyo or Osaka book out fastest 8-12 weeks ahead if you’re flying from the US, Europe, or Australia. Prices typically drop 90 days before departure, then climb again starting 60 days out. If you’re flexible on dates by even two or three days, you can save 30-50% by flying mid-week (Tuesday to Thursday) versus weekend flights. Airlines flying the Japan route include ANA, JAL, United, American, Air France, and Lufthansa—compare them yourself rather than through an aggregator to see exact schedules.
Book direct to Tokyo (Narita or Haneda) or Osaka (Kansai) depending on where the anime crowds are. For spring 2026, Tokyo is the epicenter of everything. Haneda Airport is 14km from central Tokyo; Kansai is about 75km from Osaka but has cheaper flights from certain regions. Round-trip flights from the US West Coast are running 550-850 USD in April 2026; from the East Coast, 700-1100 USD.
Lock in Accommodation Near Anime Districts
Where you stay matters more than you think. I’ve learned to stay in Nakano, Akihabara, or Ikebukuro if merch hunting and anime cafes are my priority, rather than the hyper-touristy areas like Shibuya or Shinjuku. These neighborhoods have the shops, the cafes, the vibe.
For moderate hotels (150-250 USD per night for a clean double room), Booking.com and Agoda are your best tools. Both show cancellation policies clearly—look for free cancellation up to 48 hours before arrival, which is standard for the April-May season. A 10-night stay in a decent Nakano business hotel runs about 1800-2200 USD booked now. Book sooner rather than later; good rooms in anime-friendly neighborhoods sell out by the two-month mark.
Budget options: capsule pods in Shinjuku or Ikebukuro run 40-70 USD per night and are actually social spaces where you’ll meet other anime fans. Book these through specialized sites like Nui or look on Agoda. Budget hostels with private rooms (70-120 USD per night) offer better comfort than capsules but less community.
Decide on a JR Pass
The JR Pass is essential if you’re planning to leave Tokyo for day trips or multi-day excursions. A 7-day pass costs 50,000 yen (about 200 USD at current rates) and must be purchased before you arrive in Japan—you can buy it through travel agents, travel websites, or online retailers. A 14-day pass is 46,320 yen. These pay for themselves in three or four round trips between Tokyo and major cities.
However: if you’re staying in Tokyo and Kyoto for the full trip, calculate your specific routes. Tokyo to Kyoto return on the Shinkansen (bullet train) is 27,880 yen round-trip, so a JR Pass only makes sense if you’re adding Hiroshima, Osaka, or multiple other cities. Our detailed JR Pass guide breaks down every route anime fans typically take.
Book your JR Pass exchange voucher through authorized dealers—I’ve used JR East Official and Klook (which sometimes has discounts of 5-10%). You’ll receive a voucher code to exchange at airports when you arrive. The pass only activates when you exchange it, so you can arrive and decide the timing.
Enter Anime Event Lotteries
This is the non-negotiable step that separates prepared fans from disappointed ones. Three major events require lottery entries submitted 60 days in advance:
Comiket (Comic Market): The world’s largest comic and anime convention, held in December and August. August 2026 Comiket runs August 9-11 at Tokyo Big Sight. Lottery entries for circle applications close in early June for August Comiket. Visitor registration is free but helps avoid lines. If you’re specifically coming to buy doujinshi (fan comics), submit your circle wishlist early so you can plan your booth route.
AnimeJapan 2026: Held March 21-24, 2026 at Odaiba (Tokyo Big Sight). This one has already passed for spring 2026, but for future trips, advance tickets are 2,500 yen (about 17 USD) and day-of tickets are 3,000 yen. Presale opens usually 4-6 weeks ahead. Get tickets through Anime Japan’s official site or PIA ticketing.
Anime Japan Regional Events: Throughout the year, smaller anime expos pop up in Osaka, Nagoya, and Fukuoka. Check the official event calendar to see if anything aligns with your dates. These are less crowded than Comiket and AnimeJapan.
If you’re targeting specific voice actor panels, concert performances, or screening premieres, many require separate ticket purchases. Big voice actor events sell out within 48-72 hours of general release. Set reminders 60 days before any event you’re interested in.
Research and Pre-Register for Collab Cafe Lotteries
Collab cafes (collaboration cafes featuring anime, manga, or game themes) are the hardest-to-access experience in Tokyo for anime fans. Restaurants like Marui’s collaborative venues and standalone collab cafe operators announce new collaborations 4-6 weeks before launch. The most sought-after ones (especially for seasonal anime or ongoing fan-favorite series) require lottery registration to even get a seat. Typical odds are 10:1 or worse.
Here’s the timeline:
- Week 1-2: Collaboration announcement (via official anime Twitter, venue social media, fan sites)
- Week 2-4: Pre-registration period for lottery (usually 10-14 days long)
- Week 4-5: Lottery results announced (usually via email or account login)
- Week 5-6: Collab cafe opens
- Walk-in slots: Usually 30-40% of seating held for day-of walk-ins, but expect 2-4 hour waits
You must be in Japan to register for most collab cafe lotteries (they verify by Japanese address or phone number). However, some accepting international visitors or using proxy registration services exist. Our collab cafe booking guide has the full system—which cafes accept what registration methods, what documentation you need, and real timeline examples from 2026 collaborations.
Pro tip: The biggest collab cafes have waiting lists. Even if you lose the lottery, showing up 90 minutes before closing time often gets you a 45-60 minute wait instead of the 2-3 hour waits during peak hours. Some venues hold cancellation slots that open up 24 hours before your reserved time.

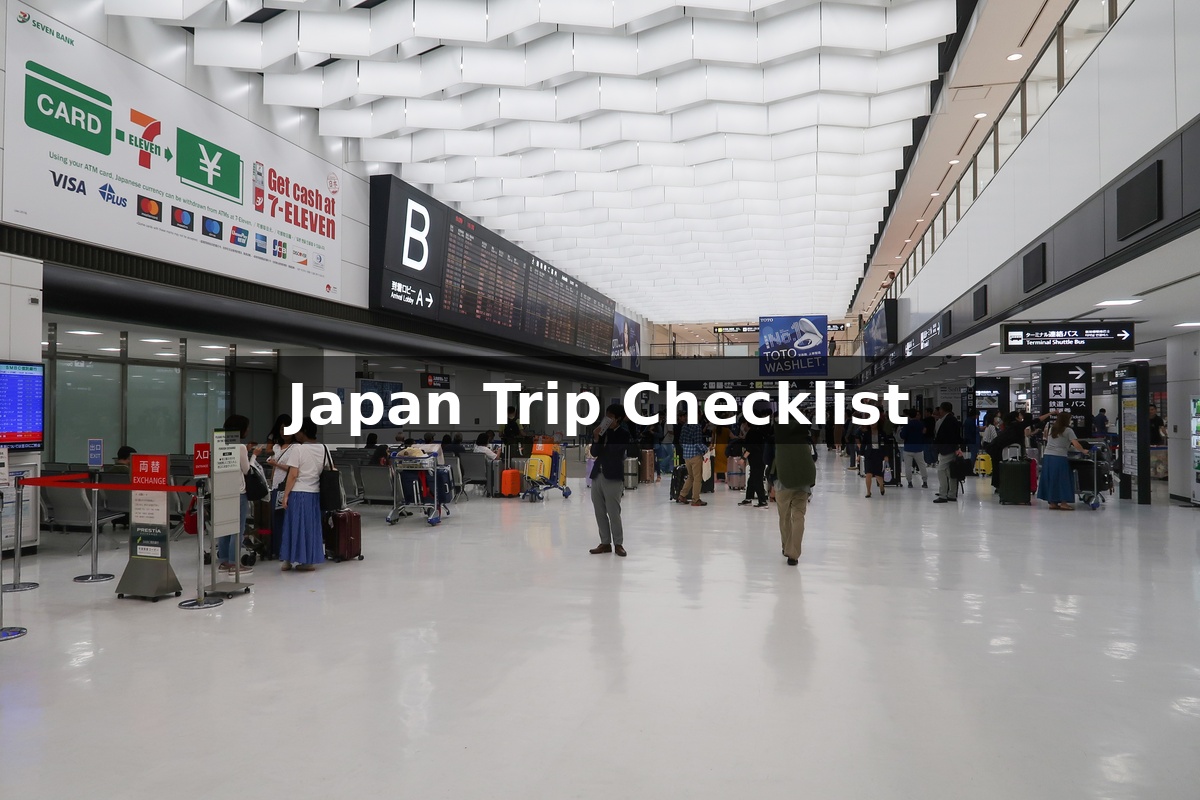
Photo: James Pere / Unsplash
1 Month Before: Connectivity & Insurance
Now that the big stuff is booked, focus on making sure you can actually function in Japan. This means internet, communication, money, and the unglamorous stuff like travel insurance that you’ll only care about if something goes wrong.
Choose and Book Your Internet Solution
You have three main options: eSIM, prepaid SIM card, or Pocket WiFi. Your choice depends on your phone compatibility, budget, and if you’re traveling with a companion.
eSIM: If your phone supports eSIM (iPhone XS or newer, most recent Android flagships), book an eSIM now from providers like Airalo, Holafly, or Smarty. A 30-day 10GB eSIM for Japan costs 25-40 USD and is installed before you leave home. No physical card means no customs friction. Download it onto your phone 2-3 days before departure to ensure compatibility.
Prepaid SIM Card: The cheapest option if your phone accepts standard SIM cards. You can buy these at Haneda or Narita airport for 3,000-5,000 yen (20-35 USD) with 5-10GB depending on provider (Docomo, SoftBank, Rakuten). Or, buy online before arrival through Japan Rail vendors and activate on arrival. Sim cards sold at airports are ready to go immediately; online purchases require 10-15 minutes of activation.
Pocket WiFi: A rental mobile hotspot that connects multiple devices and works across all phones. Costs 6-10 USD per day (180-300 USD for a month), which is more expensive than eSIM or SIM but useful if you’re traveling in a group, your phone doesn’t support eSIM or SIM swap, or you want to tether your camera. Book through Global Advanced Communications or PuPuRu for airport pickup (no rental fee if you pick up at Haneda or Narita).
I use eSIM now. It’s the smoothest experience: no activation required, switching is instant if you change your mind, and you don’t carry a second device. Our full connectivity guide includes speed tests from each provider, coverage maps, and which option works best for anime hunting in Akihabara’s basement floors (spoiler: Rakuten is weakest in underground areas, Docomo is strongest).
Buy Travel Insurance With Event Coverage
Most travel insurance policies don’t explicitly cover event ticket refunds or purchased merchandise if a collab cafe closes unexpectedly. You need insurance that covers event cancellation and lost baggage (important for merch hauls). Look for plans that include:
- Event cancellation or postponement (minimum 500 USD coverage)
- Baggage loss or delay (minimum 2,500 USD coverage)
- Emergency medical and dental (important if you get food poisoning right before AnimeJapan)
- Trip interruption (if you need to leave early)
Annual multi-trip policies from Allianz or Blue Cross run 150-300 USD per year and cover unlimited trips. Single-trip policies for a 10-day Japan trip typically cost 35-70 USD. I’ve never used it, but I also know people who’ve been grateful for baggage coverage after their suitcase got delayed 4 days in Narita and arrived after they’d already left Tokyo (forcing a hotel night in Kyoto to wait for luggage containing their event outfit).
Make Money Decisions: Cash vs Cards vs IC Cards
Japan’s payment system is split between cash, credit cards, and IC cards (prepaid transit/shopping cards like Suica or Pasmo). Most anime shops in Akihabara’s backstreets accept only cash or IC card, not credit cards.
Cash: Withdraw 100,000-150,000 yen (680-1,020 USD) on arrival from any 7-Eleven ATM using your home debit card. This covers 10 days of accommodation, food, shops, and transit if you’re budget-conscious. Japanese ATMs don’t charge foreign fees at 7-Eleven, but your home bank might charge 2-3 USD per withdrawal. Withdraw once, not multiple times. Keep 20,000 yen (135 USD) in small bills—many ramen shops and small merch stands don’t break 10,000-yen notes.
Credit Cards: Visa and Mastercard work at chain restaurants, hotels, and large shops (Yodobashi, Akihabara’s big stores). American Express and Discover are less widely accepted. However, many anime-specific small shops, doujinshi sellers, and collab cafes prefer cash. Don’t rely on plastic alone.
IC Cards (Suica/Pasmo): Buy a Suica card at the airport for 2,000 yen (includes 1,500 yen balance, 500 yen card deposit) or use a Suica app on your phone if it supports it. Load up 10,000 yen per week of your trip. Use it for every train ride, convenience store, and vending machine. You’ll use this card constantly—probably your most-used payment method after cash.
Download Essential Apps Now
Download and set up these apps before you travel. They work even without internet if you download maps/data beforehand:
- Google Maps: Download offline maps for Tokyo, Kyoto, and Osaka. Go to your destination, tap it, select “Download.” This works without data connection.
- Google Translate Camera: Point your phone at menu text, shop signs, or bromide cards and it translates instantly. major upgrade for understanding limited edition merch descriptions.
- Japan Official Travel App: The JNTO app has restaurant info, event listings, and location guides. Less useful than Google Maps, but good for vetting restaurants.
- Japan Transit: Hyperdia (free app) is the most detailed train and Shinkansen scheduling tool. It calculates exact fares, transfer times, and platform numbers.
- Yahoo Maps: Japan-specific mapping with better restaurant and shop listings than Google. Download the Japanese version; it’s more detailed for local venues.
- Twitter/X: Follow anime shops, collab cafe announcements, and event organizers. Most breaking news about limited merch restocks or event changes hits Twitter first, sometimes hours before official channels.
- Manga Up or Comixology: If you’re reading manga on transit, load up digital versions before you go. The manga reading experience in Japan feels different knowing you’re literally in the country where it’s published.
2 Weeks Before: Collab Cafe & Event Prep
With two weeks to go, you’re in the homestretch. Now you’re confirming details and making backup plans.
Check Lottery Results and Plan Walk-In Strategy
If you’ve entered collab cafe lotteries, results drop around this time. Check your email and account logins obsessively—some venues send results via email that might hit your spam folder. If you won, you’ll receive a confirmation email with your reserved time slot (usually a specific 2-hour window) and instructions for arrival.
If you lost (odds are you will, at least once), don’t panic. Most collab cafes hold 30-40% of seating for walk-in customers. The strategy is to show up 90-120 minutes before closing time on a weekday (Tuesday-Thursday are slowest). Expect a 1-2 hour wait, but you’ll get in. Pro tip: Bring a book or charge your phone. Also, walk-in customers often get first dibs on merchandise if the limited collab goods start selling out—I’ve waited 90 minutes for a cafe and gotten the last five bromides in my target character.
Make Restaurant Reservations for Themed Dining
Beyond collab cafes, Tokyo has restaurants specifically decorated with anime themes or that serve anime-inspired food. These don’t always require reservations, but popular ones do, especially for evening slots (6 PM – 8 PM) on weekends.
- Ghibli-themed restaurants: Mostly in dedicated Ghibli Museum-adjacent cafes. Reservation required, usually booked 2-4 weeks ahead through their websites.
- Anime-branded ramen chains: Ichiran, Hakatarama, and regional chains often have anime collaborations. These rarely require reservations and accept walk-ins.
- Karaoke boxes: Book a private karaoke room (500-1,500 yen per hour, 3-5 USD per person) where you and friends can sing anime openings without judgment. Rooms often have extensive anime music libraries. Book through Karaoke Bantam (Japanese only) or ask your hotel concierge.
I recommend making reservations for any themed restaurant where ambiance is half the appeal, but being flexible for casual ramen shops.
Book Studio Tours
Ghibli Museum in Mitaka (30 minutes west of central Tokyo) is the most popular anime studio tour, and it requires advance tickets. Tickets go on sale the first of every month for visits 4-6 weeks ahead, and they sell out within 1-3 days. The museum was closed for renovation until March 2026 and is operating at reduced capacity through mid-2026, so book the moment tickets release. Tickets are 1,000 yen for adults (about 7 USD) and only available through the official Ghibli Museum site (Japanese-only, but straightforward to get around).
Alternative studio tours with better availability:
- MAPPA Studio: Limited public tours, usually book 2-3 weeks ahead. Check their official website and follow their Twitter for announcements.
- Ufotable Studio: Offers limited visitor access; best to contact directly or visit their visitor center in Okuizumo if you’re traveling to the Shimane region.
- Kyoto Animation Studio Tour: The studio offers occasional open-house tours; rare and advance notice required, but reachable via day trip from Kyoto.
None of these are easy to access for casual visitors, which is why the Ghibli Museum is the go-to. Budget 3-4 hours and expect crowds even on weekdays.

Photo: Getty Images / Unsplash
1 Week Before: Packing for Anime Fans
Packing for an anime trip is different than regular travel. You’re going to buy merch. Plan accordingly.
Bring an Extra Suitcase or Foldable Tote Bag
This is non-negotiable. I arrived in Tokyo once without planning for merch and ended up buying an extra suitcase (4,500 yen, about 30 USD) from a convenience store because my carry-on was full by day three. A better approach is to bring a flat, foldable duffel bag (available from any outdoor gear store for 20-40 USD) or even a collapsible tote bag. Leave it flat in your luggage on the flight, unfold it when you’re ready to haul merch back to your hotel. On day 10, you can either check this bag as additional luggage on the return flight (usually 50-100 USD per airline) or ship it home via international postal service (about 100-150 USD for a 20kg box from Japan to the US).
Pack a Portable Charger and Cable
Using Google Maps on transit drains battery fast. A 20,000mAh portable charger (30-50 USD) charges your phone 5-6 times. Bring two charging cables (one for your phone, one as backup) because you’ll be charging constantly while walking around Akihabara with your phone in hand.
Bring Clear File Folders
Anime events, cafes, and shops sell loose prints, bromides (trading cards), and postcards. A 100-yen clear file folder (about 70 cents from any 100-yen shop in Japan, or 5-8 USD online before arrival) protects these items from folding, water damage, or getting bent in your bag. Buy them once you’re in Japan, or pack two or three paper sleeves.
Get Cash in Yen Before You Leave
Many small anime shops, independent merch sellers, and street stalls only accept cash. While ATMs are everywhere, it’s reassuring to have 100,000-150,000 yen (680-1,020 USD) in your possession from the start. Some people order yen exchange before leaving home (through their bank), which avoids the airport exchange line entirely.
If you’re flying from the US, you can order yen through:
- XE Currency Exchange (delivery to your home or pickup at airport)
- Your bank (usually available within 2-3 business days)
- Airport exchange (convenience but rates are 3-5% worse)
Wear Comfortable Shoes
Anime shopping in Tokyo means miles of walking—Akihabara’s electric town district is dense and has narrow streets. Break in your shoes before departure. Bring an extra pair for swollen ankles on day 6 or 7. Japan has convenience stores everywhere, so you can buy replacement insoles or ankle support if you get sore.
Day 1 in Japan: First Things to Do
You’ve arrived. Here’s the immediate action list.
Activate Your JR Pass (If You Have One)
Go to the JR East office at Haneda or Narita to exchange your voucher for the physical JR Pass. This takes 10 minutes. The office is near the train station entrance on level 1 or B1 (depending on terminal). Hours are roughly 8:15 AM – 7:00 PM daily. Write down the activation date you want (some people activate immediately, others wait 2-3 days to use it for specific trips). The JR Pass is valid for 7 or 14 consecutive days from activation.
Get an IC Card
Even if you already bought a Suica app on your phone, having a physical IC card is useful because some vending machines and older ticket machines don’t accept phones. Buy a Suica or Pasmo card at any station for 2,000 yen and load it with 10,000 yen to start. Top it up whenever it dips below 5,000 yen using station machines or convenience store registers.
Buy a Prepaid SIM or Activate Your eSIM
If you’re using a prepaid SIM card, buy it at the airport phone shop (SoftBank, Docomo, or Rakuten kiosks are in the main terminal near exits). If you’re using eSIM, activate it now that you’re in Japan and need the data connection. Expect 10-15 minutes of setup time. Test it before leaving the airport by opening Google Maps or Twitter.
Withdraw Cash at 7-Eleven ATM
Head to any 7-Eleven and use the 7-Bank ATM (usually near the entrance) to withdraw yen using your home debit card. Withdraw in one transaction to minimize fees. The machine interface is available in English. Process takes about 3 minutes. You’ll pay zero foreign fees from 7-Eleven but check if your home bank charges a currency exchange fee (most do, around 2-3 USD).
Get to Your Hotel
Now you have internet, money, and transit options. Head to your accommodation. Most hotels check in after 3 PM, but many will hold luggage if you arrive earlier. Use this time to grab coffee and acclimate.
Downloadable Checklist
Copy this checklist and paste into a note-taking app, or print it out:
JAPAN ANIME TRIP CHECKLIST - 2026

3 MONTHS BEFORE:
[ ] Book flights (aim for 90 days out for best prices)
[ ] Reserve accommodation in Nakano, Akihabara, or Ikebukuro
[ ] Decide on JR Pass and purchase exchange voucher
[ ] Research anime events (AnimeJapan, Comiket, regional expos)
[ ] Submit collab cafe lottery registrations (as they become available)
[ ] Follow anime venue Twitter accounts for announcements

1 MONTH BEFORE:
[ ] Book eSIM, prepaid SIM, or Pocket WiFi
[ ] Purchase travel insurance with event cancellation coverage
[ ] Plan cash withdrawal strategy (7-Eleven ATM on arrival)
[ ] Download offline maps (Tokyo, Kyoto, Osaka) in Google Maps
[ ] Download Japan Transit, Google Translate Camera, Yahoo Maps
[ ] Check your phone supports eSIM or SIM swap

2 WEEKS BEFORE:
[ ] Check collab cafe lottery results and note reservation times
[ ] Make restaurant reservations for themed dining
[ ] Book Ghibli Museum tickets (if available for your dates)
[ ] Confirm all event tickets are in your email
[ ] Screenshot hotel and JR Pass booking confirmations
[ ] Check airline bag allowance (especially return flight)

1 WEEK BEFORE:
[ ] Buy or pack foldable duffel bag for merch
[ ] Pack portable charger and extra cables
[ ] Break in walking shoes
[ ] Order yen exchange if not getting from ATM
[ ] Reconfirm all bookings 7 days before
[ ] Test eSIM on phone if using it

DAY BEFORE DEPARTURE:
[ ] Take screenshots of all confirmations
[ ] Check passport expiration (valid 6+ months recommended)
[ ] Test all downloaded maps and apps
[ ] Charge all devices

DAY 1 IN JAPAN:
[ ] Clear customs and immigration
[ ] Activate JR Pass if purchased (at JR office in airport)
[ ] Buy IC card (Suica/Pasmo) and load with 10,000 yen
[ ] Activate eSIM or buy prepaid SIM at phone shop
[ ] Withdraw yen at 7-Eleven ATM (100,000-150,000 yen)
[ ] Head to accommodation
[ ] Eat something, sleep, recover

DAY 2 ONWARD:
[ ] Confirm collab cafe reservation times and arrive early
[ ] Scout Akihabara shops and gather merch lists
[ ] Check social media for limited drops and restocks
[ ] Enjoy your trip
More Practical Guides
One last thing: I always tell people this before their first trip. The planning phase is when anime fans either set themselves up for success or set themselves up for regret. Showing up without a JR Pass costs you money and time. Skipping collab cafe lottery entries means missing out on themed menus and exclusive merch. Not booking accommodation in the right neighborhood means you’re spending 45 minutes on transit to reach Akihabara when you could walk there in 15 minutes. But the good news is that most of this stuff takes less than an hour of actual work spread across three months. Do the work now, and your trip in May, June, or whenever you’re headed over will be immeasurably better.
Follow @japan_pop_now on Instagram for daily Tokyo pop culture updates.
Written by Takapon
Born and raised in Kyoto, currently in Tokyo. Former management consultant turned anime culture writer. Has visited countless collaboration cafes and pilgrimage spots across Japan. Also sharing tips on Instagram @pop_now_jp.
Follow @pop_now_jp on Instagram
Comments